Run Jupyter notebook on AWS EC2 using Putty
This post originates from my frustrations while installing and working with Open Slide in a Windows machine. For some reason I could not get it to work.
Since most packages for openslide-python, the package I required, are written for Linux, I needed a Linux machine. That and my hesitation to dual boot my laptop with Linux, made me look towards Amazon Web Services.
AWS provides free tier instances for EC2 instances for free for a year after initial sign up. This was a good opportunity to use this free service.
What I figured out was a very convoluted process to run a Jupyter notebook on a free Linux machine.
But hey, we are learning right?
With that disclaimer out of the way, lets jump in.
Create an AWS EC2 instance
Creating an EC2 instance is as straightforward as logging into the AWS Console and choosing any of the free tier instances available. I chose to go for the most basic instance, since that would suffice for my needs.
The tricky part however is connecting to AWS and running a Jupyter notebook through your Windows machine.
Here comes Putty (horrible name) to the rescue.
Install Putty
Download putty and install it on your windows machine. Pretty standard stuff.
Connecting to EC2 via Putty.
When you login to AWS Console and navigate to the EC2 service, you will see something like this

If you already have a key pair, then you should have saved it somewhere on your local system, since you cannot download it again.
If you don’t, you can always create a new pair. Download the .pem file and save it to a folder in your local machine.
We are doing all this since we need a public-private key pair to actually make a connection to EC2 instance via SSH.
Convert .pem to .ppk file format
Since Putty cannot use .pem file format, we need to convert it to a useable format.
Here is a good stack overflow answer to help you through.
https://stackoverflow.com/questions/3190667/convert-pem-to-ppk-file-format
At the end of this you should have a public-private key pair saved safely in your local system.
Now we can start configuring Putty to connect to our EC2 instance.
Configuring Putty

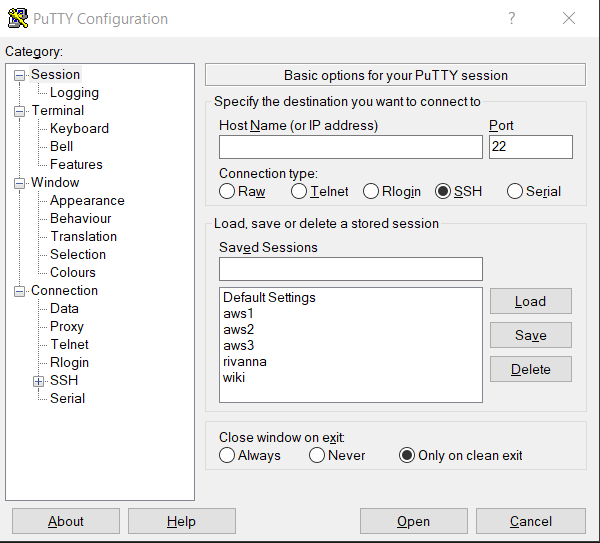
This is what Putty looks like.
Lets start.
- Since I used “Amazon Linux 2 AMI (HVM)”, the host name field in the interface is ec2-user@[IPV4 address]. IPV4 address is the one I highlighted in the picture below. Just select and copy.

If you had used a Ubuntu instance, the host name would be ubuntu@[IPV4 address].
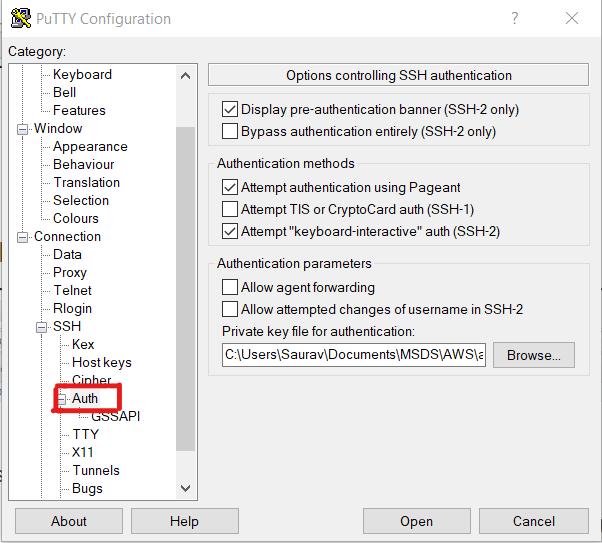
- Go to Connection -> SSH -> Auth and paste the path of your private key (.ppk file).

This completes your basic setup.
Tunneling using Putty
This is the magic sauce that enable us to connect to Jupyter notebooks running on your AWS EC2 instance and it is deceptively easy.
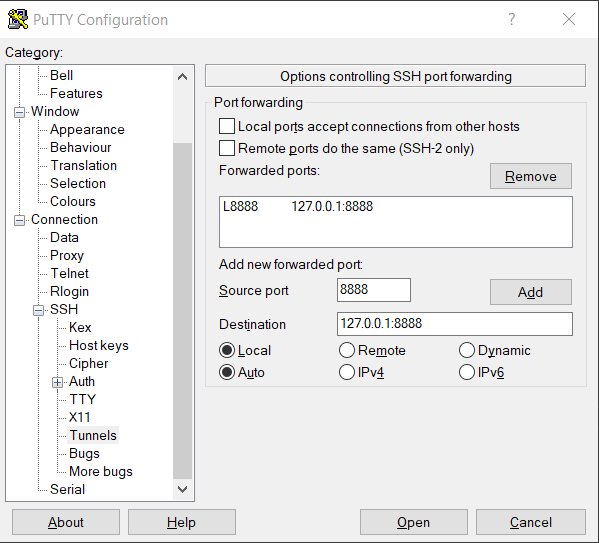
In your Putty interface, go to Connection -> SSH -> Tunnels.
Normally Jupyter notebooks start on port 8888. Therefore we configure port forwarding accordingly.

After filling the above fields, click on Add.
One last step is saving your Putty session, so that we do not have to go through this again.
Go back to Session in the Putty GUI, and in the Saved Sessions field, you can name your session as aws_ec2 and click on Save.
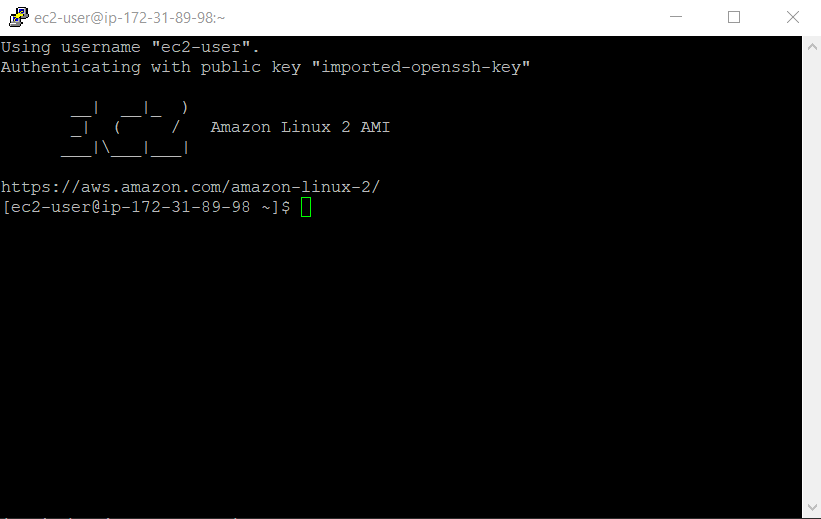
Now if you click Open, you should be able to connect to the bash terminal of your running EC2 instance.
It should look something like this.

Final Steps
Since you have access to the terminal of your EC2 instance, go ahead download the Anaconda Linux installer -
wget https://repo.anaconda.com/archive/Anaconda3-2018.12-Linux-x86_64.sh
Next install Anaconda -
bash Anaconda3-2018.12-Linux-x86_64.sh
This will install Jupyter and all other data science packages.
Go ahead and launch your Jupyter notebook using -
jupyter notebook --no-browser
It will create localhost:8888 url in the shell with the token id attached.
Paste that on the browser in your computer and see magic happen.
Enjoy Reading This Article?
Here are some more articles you might like to read next: